Next.jsのフォント設定
投稿日:2024年09月20日
更新日:2024年09月23日
Next.jsのフォントの使い方を見ていきます。
今回は、主にGoogleフォントの使い方を見ます。
プロジェクトの作成
プロジェクトは、CloudflareのCLIを使って作成します。
これは、Cloudflare Pagesにデプロイすることを前提にしているためです。
bun create cloudflare@latest What would you like to start with?と聞かれます。
framework starterを選択します。
What would you like to start with?
  ○ Hello World example
  ● Framework Starter
  ○ Application Starter
  ○ Template from a Github repo
続けて、frameworkはNextを選択します。
Which development framework do you want to use?
  ○ Analog
  ○ Angular
  ○ Astro
  ○ Docusaurus
  ○ Gatsby
  ○ Hono
  ● Next
  ○ Nuxt
  ○ Qwik
  ○ React
  ○ Remix
  ○ Solid
  ○ Svelte
  ○ Vue
  ◁ Go back
Next.jsの質問は、すべてそのまま答えます。
Would you like to use TypeScript? … Yes
Would you like to use ESLint? … Yes
Would you like to use Tailwind CSS? … Yes
Would you like to use `src/` directory? … No
Would you like to use App Router? (recommended) … Yes
Would you like to customize the default import alias (@/*)? … No
eslint-pluginはyesを選択します。
Do you want to use the next-on-pages eslint-plugin?
  Yes
deployはしないので、noを選択します。
Do you want to deploy your application?
no
成功すると、以下のように表示されます。
 ╭──────────────────────────────────────────────────────────────╮
 │ 🎉  SUCCESS  Application created successfully!               │
 │                                                              │
 │ 💻 Continue Developing                                       │
 │    Change directories: cd my-app                             │
 │    Start dev server: bun run dev                             │
 │    Deploy: bun run deploy                                    │
 │                                                              │
 │ 📖 Explore Documentation                                     │
 │    https://developers.cloudflare.com/pages                   │
 │                                                              │
 │ 💬 Join our Community                                        │
 │    https://discord.cloudflare.com                            │
 ╰──────────────────────────────────────────────────────────────╯
フォントのデフォルトの設定
フォントの設定は、layout.tsxで行います。layout.tsxを開くと、デフォルトでGoogleフォントのInterが標準で設定されています。
import type { Metadata } from "next";
import { Inter } from "next/font/google";
import "./globals.css";

const inter = Inter({ subsets: ["latin"] });

export const metadata: Metadata = {
  title: "Create Next App",
  description: "Generated by create next app",
};

export default function RootLayout({
  children,
}: Readonly<{
  children: React.ReactNode;
}>) {
  return (
    <html lang="ja">
      <body className={inter.className}>{children}</body>
    </html>
  );
}まずは、next/font/googleから、Interをインポートします。
import { Inter } from "next/font/google";次に、関数Interのインスタンスを作成します。subsetsプロパティには、使用する文字セットを指定します。
ここでは、latinを指定しています。latinとは、読んで字の如く、ラテン文字を意味しています。
次に、定数interにインスタンスを格納します。
const inter = Inter({ subsets: ["latin"] });最後に、RootLayoutの<body>のclassNameプロパティに定数interを指定します。
すると、そのフォントが全体に適用されます。
export default function RootLayout({
  children,
}: Readonly<{
  children: React.ReactNode;
}>) {
  return (
    <html lang="ja">
      <body className={inter.className}>{children}</body>
    </html>
  );
}
フォントの設定の基礎
フォントの設定方法について、詳しく見ていきます。subsetsプロパティ以外にも、いろんなプロパティがあります。
ここでは、主に使うweightプロパティと、displayプロパティを見てみます。
const inter = Inter({
  subsets: ["latin"],
  weight: ["400", "700"],
  display: "swap",
});weightプロパティには、フォントの太さを設定します。100から、900まで、すべて指定します。
また、特定の値だけを指定することもできます。
たとえば、400と700だけ使いたいなら、それ以外の値を削除します。
そうすることで、指定した値以外は使えなくなります。
// すべての値を指定
weight: ["100", "200", "300", "400", "500", "600", "700", "800", "900"]
// 特定の値を指定
weight: ["400", "700"]displayプロパティには、フォントの表示方法を指定します。
デフォルトでswapが設定されています。swapに設定すると、フォントが読み込まれるまで代替フォントが表示されます。
基本的には、デフォルトのswapままでいいと思います。
display: "swap"複数のフォントの設定方法
新たに、layout.tsxにフォントNoto Sans JPの設定を追加します。
フォントNoto Sans JPのプロパティは、フォントInterと同じプロパティを使います。
また、<body>の定数interを定数noto_Sans_JPに変更します。
  import type { Metadata } from "next";
- import { Inter } from "next/font/google";
+ import { Inter, Noto_Sans_JP } from "next/font/google";
  import "./globals.css";

  const inter = Inter({
    subsets: ["latin"],
    weight: ["400", "700"],
    display: "swap",
  });

+ const noto_Sans_Jp = Noto_Sans_JP({
+   subsets: ["latin"],
+   weight: ["400", "700"],
+   display: "swap",
+ });

  export const metadata: Metadata = {
    title: "Create Next App",
    description: "Generated by create next app",
  };

  export default function RootLayout({
    children,
  }: Readonly<{
    children: React.ReactNode;
  }>) {
    return (
      <html lang="ja">
-       <body className={inter.className}>{children}</body>
+       <body className={noto_Sans_Jp.className}>
+         {children}
+       </body>
      </html>
    );
  }
Tailwind CSSの設定
次に、Tailwind CSSにフォントの設定を追加します。InterとNoto_Sans_JPにvariableプロパティを追加します。variableプロパティは、CSSカスタムプロパティ(CSS変数)を定義するために使用します。
分かりやすく言えば、別名を設定するようなものです。Interには、--font-interを、Noto_Sans_JPには、--font-notoをそれぞれ指定します。
  const inter = Inter({
    subsets: ["latin"],
    weight: ["400", "700"],
    display: "swap",
+   variable: "--font-inter",
  });

  const noto_Sans_Jp = Noto_Sans_JP({
    subsets: ["latin"],
    weight: ["400", "700"],
    display: "swap",
+   variable: "--font-noto",
});次に、tailwind.config.tsに各フォントの設定を追加します。backgroundImageは必要ないので削除します。
次に、次に、fontFamilyプロパティを追加します。
その中にinterプロパティには、[“var(--font-inter)“]を、notoプロパティには、[“var(--font-noto)“]をそれzれ指定します。
  import type { Config } from "tailwindcss";

  const config: Config = {
    content: [
      "./pages/**/*.{js,ts,jsx,tsx,mdx}",
      "./components/**/*.{js,ts,jsx,tsx,mdx}",
      "./app/**/*.{js,ts,jsx,tsx,mdx}",
    ],
    theme: {
      extend: {
-       backgroundImage: {
-         "gradient-radial": "radial-gradient(var(--tw-gradient-stops))",
-         "gradient-conic":
-           "conic-gradient(from 180deg at 50% 50%, var(--tw-gradient-stops))",
-       },
+       fontFamily: {
+         noto: ["var(--font-noto)"],
+         inter: ["var(--font-inter)"],
+       },
      },
    },
    plugins: [],
  };

  export default config;
配列で指定できるのは、複数のフォントを指定できるためです。
たとえば、notoプロパティのvar(--font-noto)の後に、sans-serifを追加します。
そうすると、var(--font-noto)が読み込めなかった時に、代わりにsans-serifを読み込むことができます。
ついでに、interプロパティにも、sans-serifを追加します。
  fontFamily: {
-   noto: ["var(--font-noto)"],
+   noto: ["var(--font-noto)", "sans-serif"],
-   inter: ["var(--font-inter)"],
+   inter: ["var(--font-inter)", "sans-serif"],
},最後に、layout.tsxに戻って、bodyタグにフォントのvariableを設定します。noto_Sans_JP.classNameを、バッククォート、ナミカッコで囲います。
ナミカッコの前に、ドルを追加します。
そして、ドル、ナミカッコを追加して、inter.variableを追加します。
  <html lang="ja">
- 	<body className={noto_Sans_JP.className}>{children}</body>
+ 	<body className={`${noto_Sans_JP.className} ${inter.variable}`}>
+ 		{children}
+ 	</body>
</html>これで、interプロパティの頭にfont-を追加して、classNameでフォントを指定できます。
動作確認
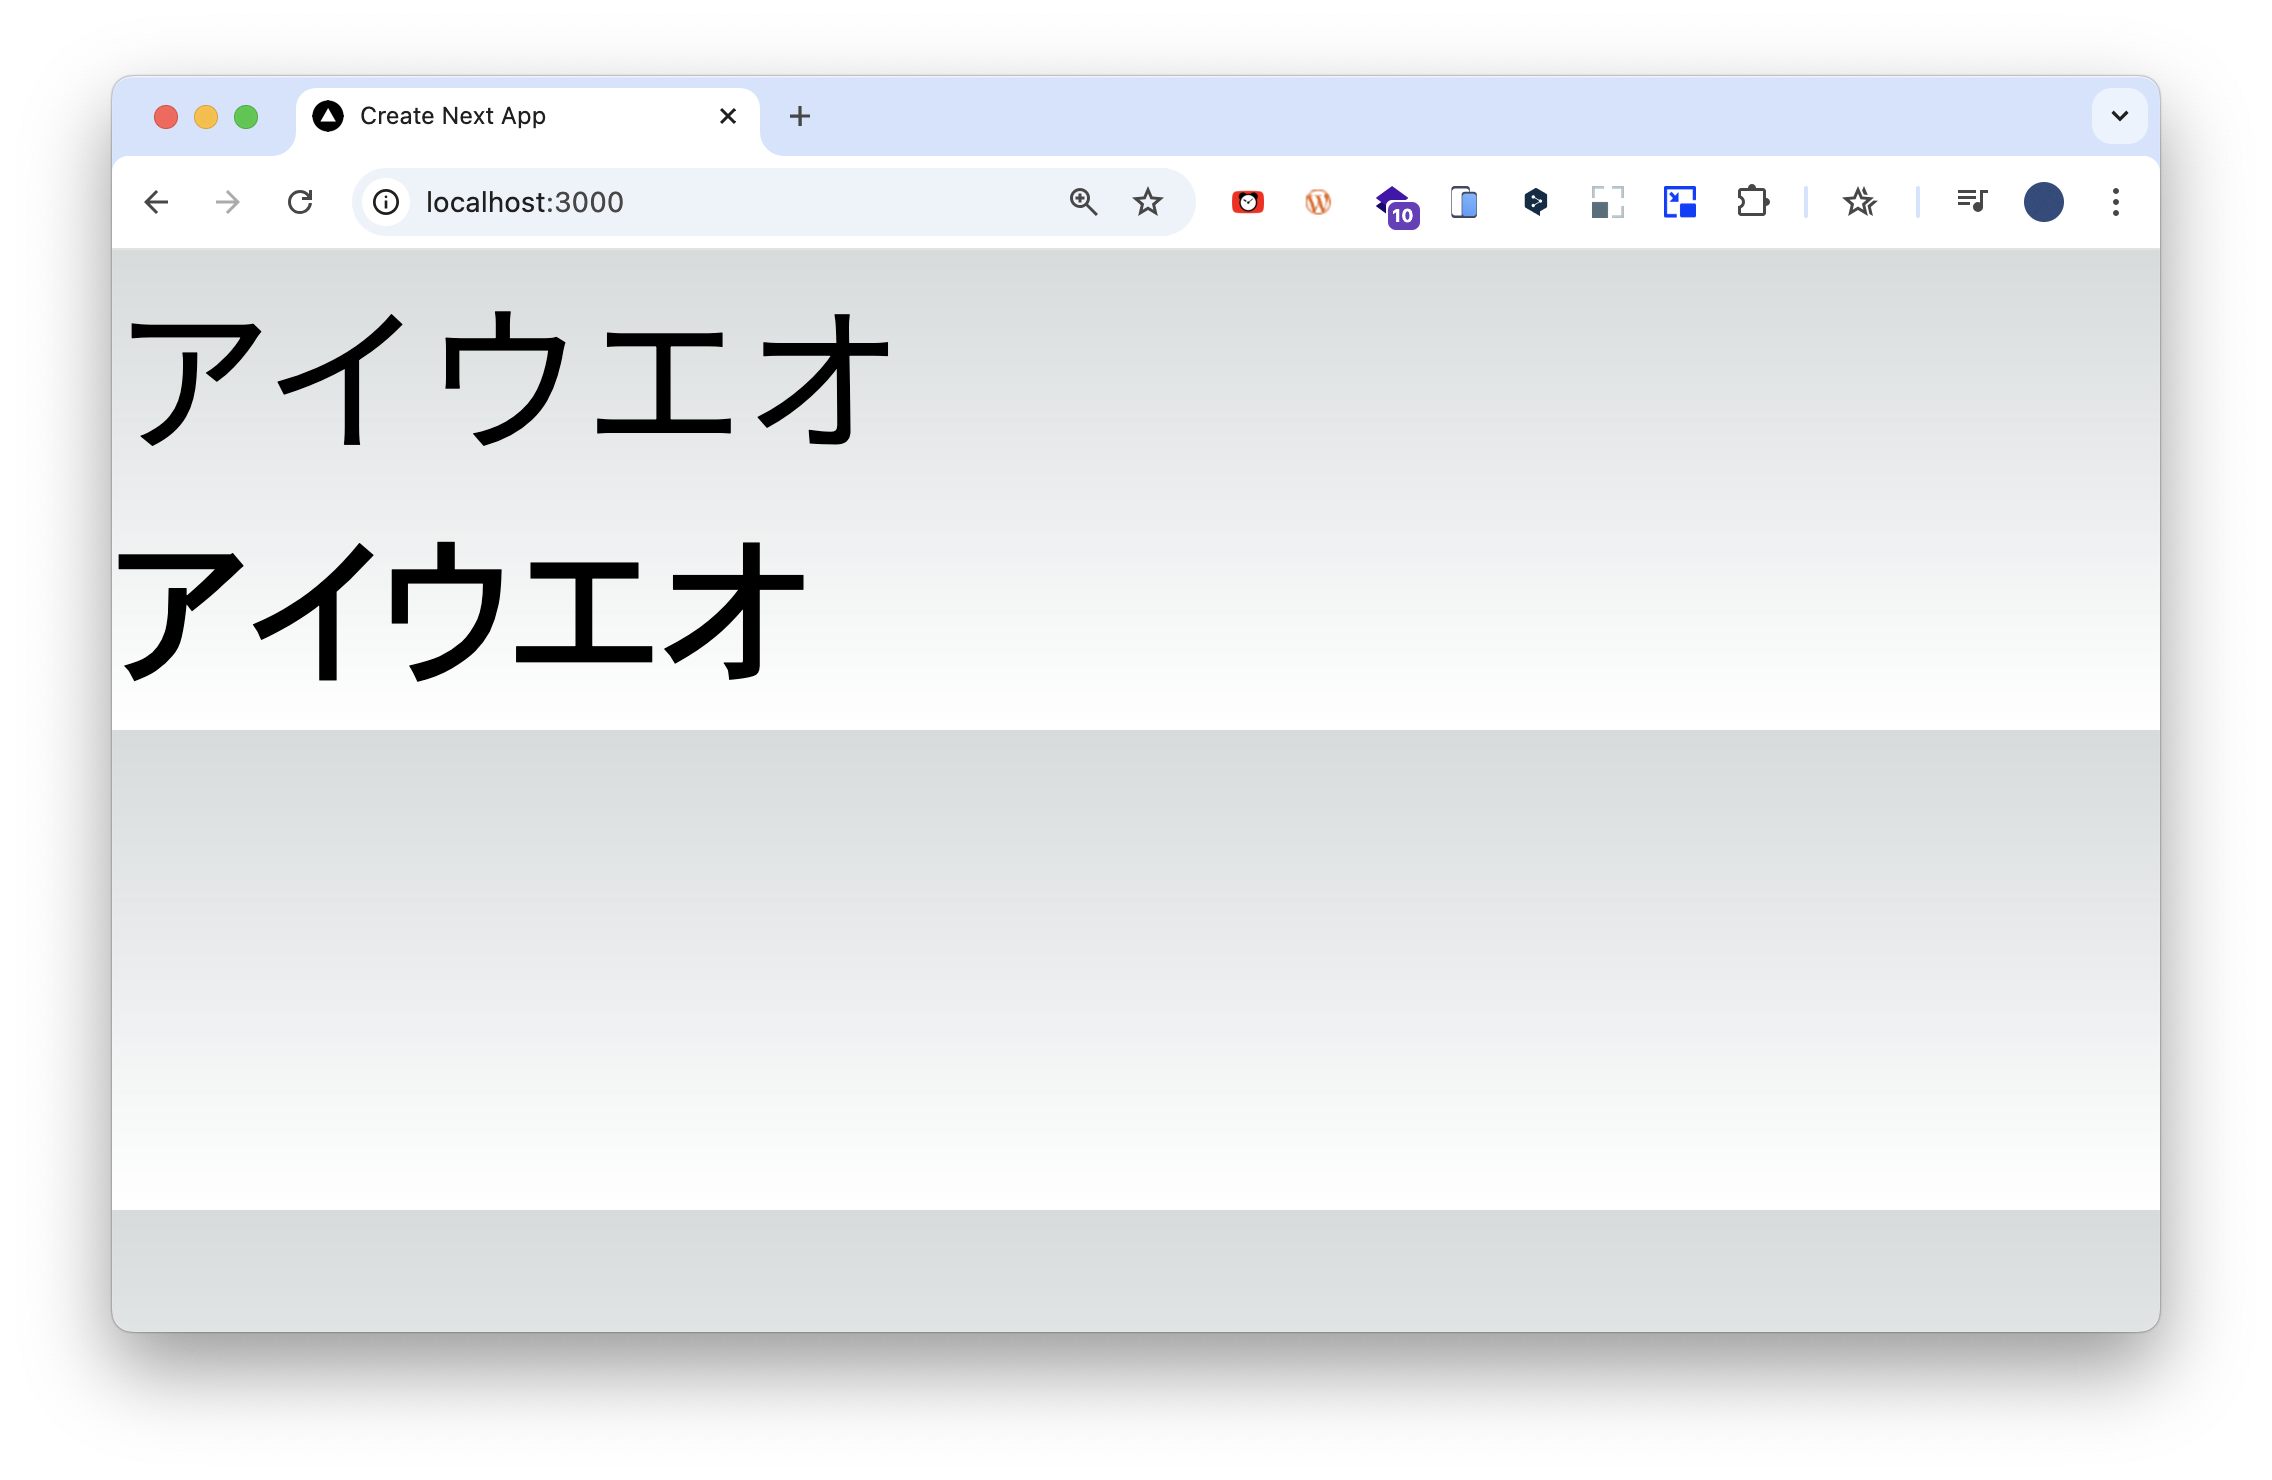
フォントの設定が動作するか確認します。page.tsxを開いて、以下のように変更します。
export default function Home() {
  return (
    <main className="">
      <p>アイウエオ</p>
      <p>アイウエオ</p>
    </main>
  );
}
簡易サーバーを立ち上げて、ブラウザで確認します。
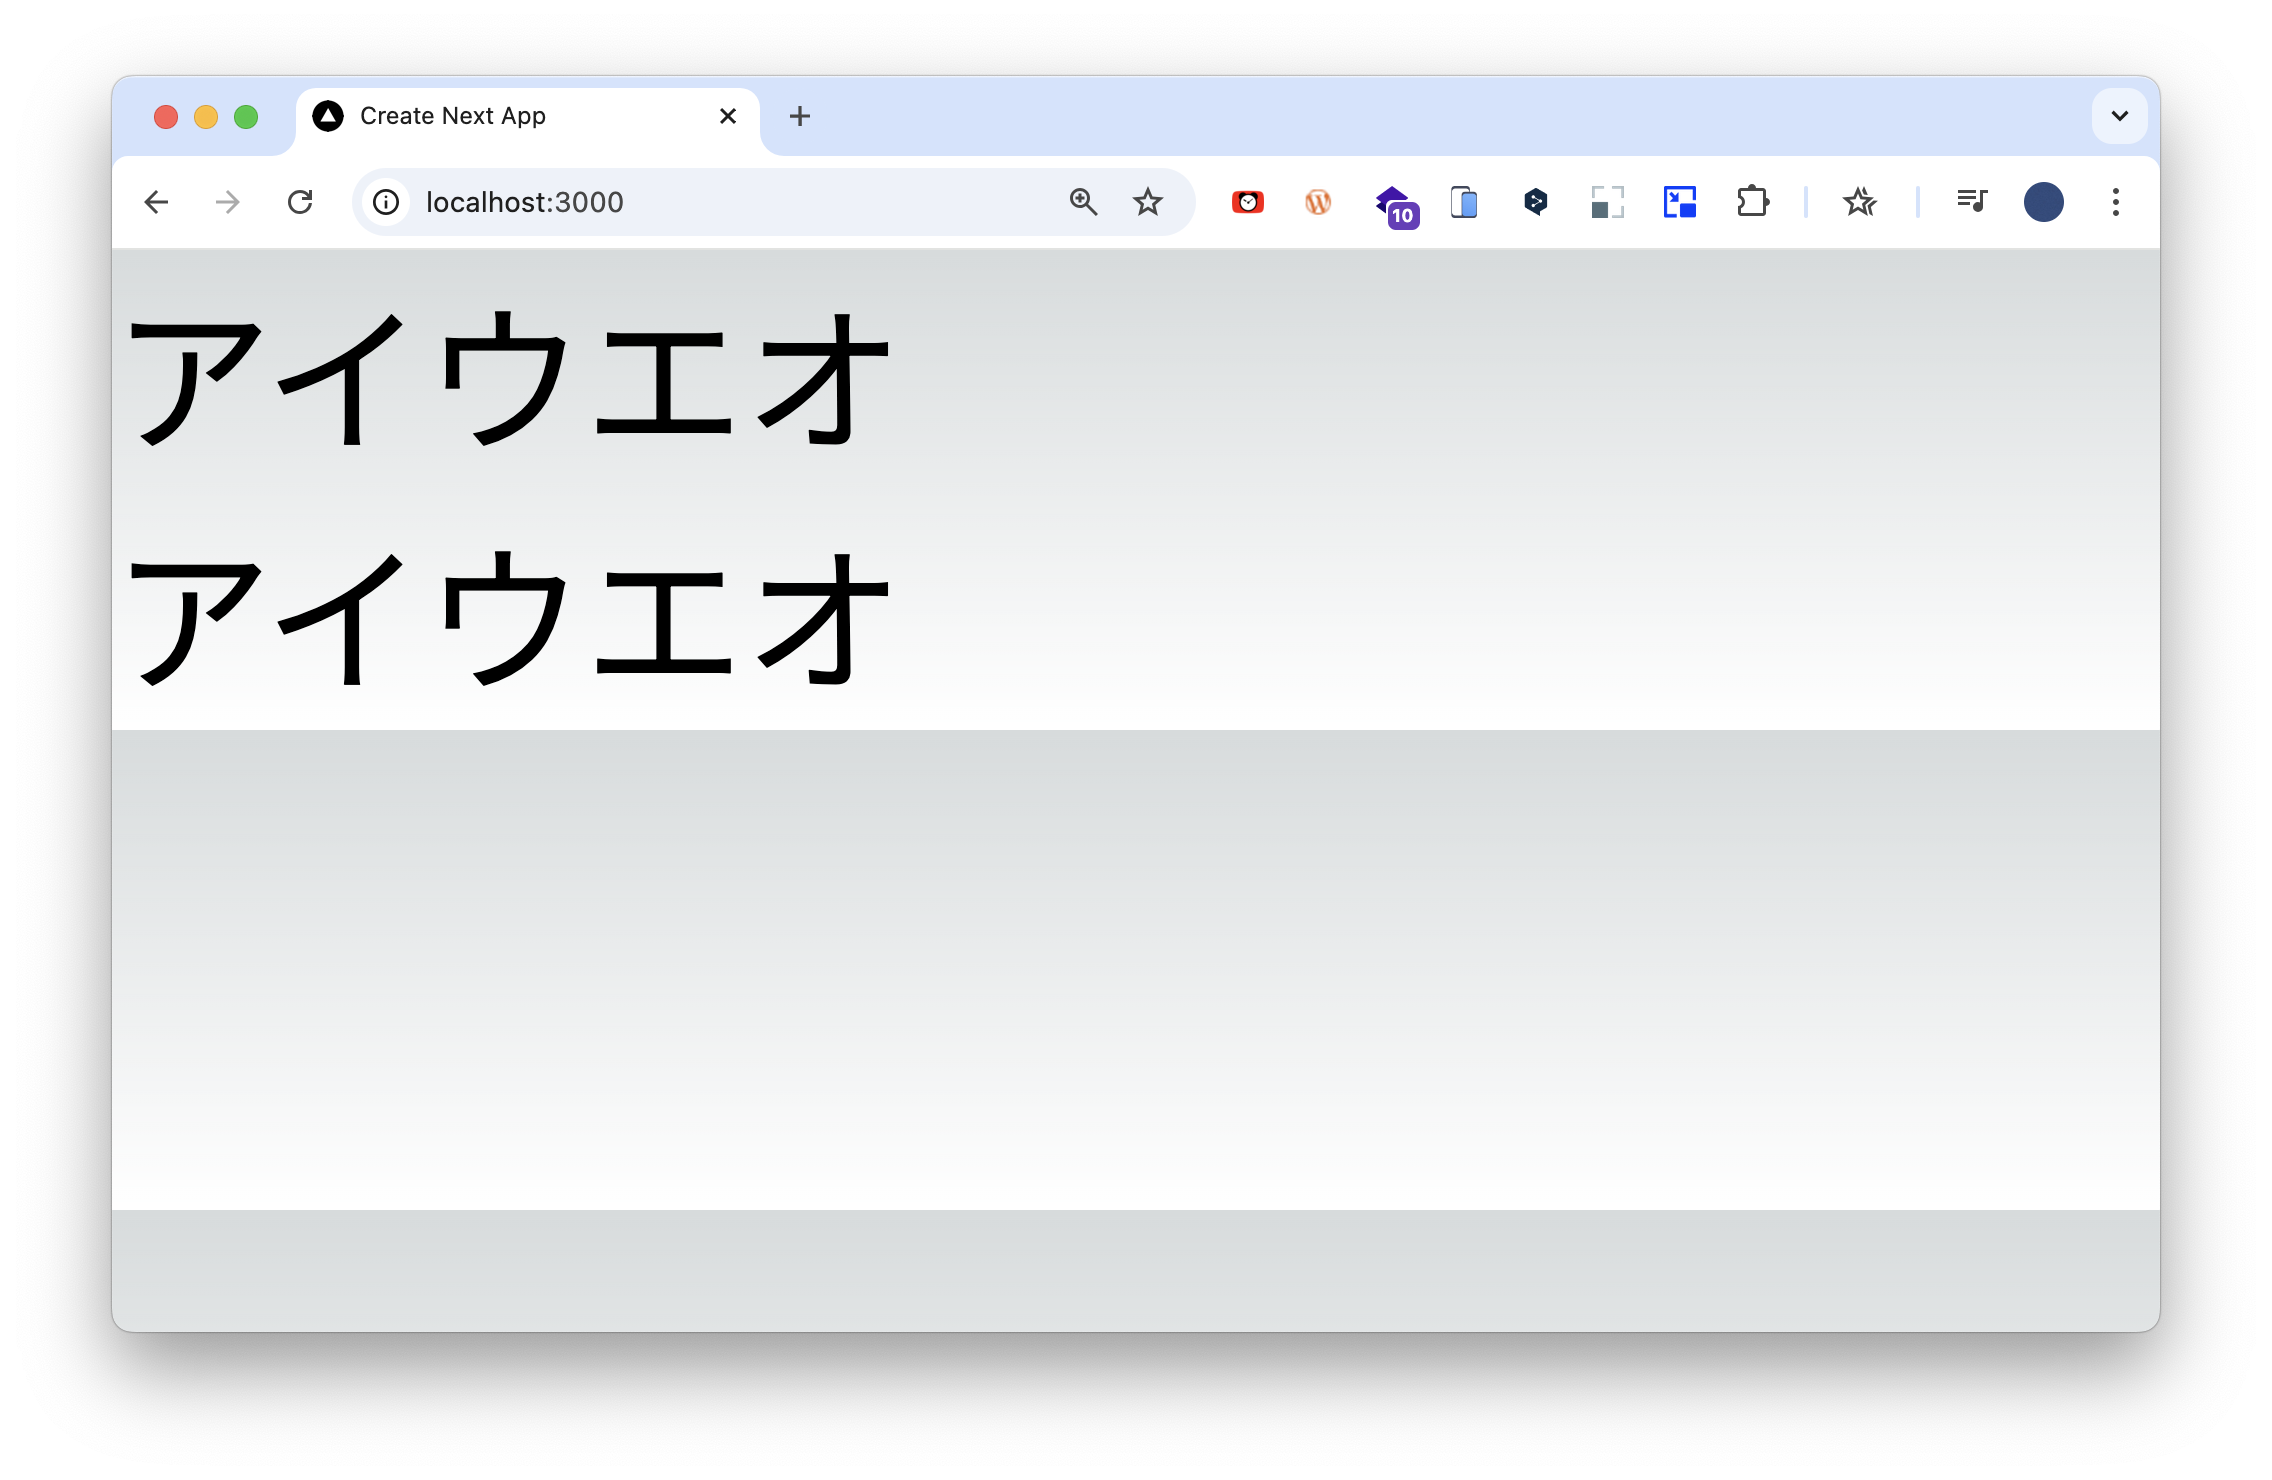
下の<p>にclassNameを追加して、font-interを指定します。
export default function Home() {
  return (
    <main className="">
      <p>アイウエオ</p>
      <p className="font-inter">アイウエオ</p>
    </main>
  );
}
もう1度、ブラウザで確認します。
フォントが変わったのがわかります。